
You have just had a root canal, or you are about to have one, and the question at the top of your mind is completely understandable: when can I eat normally again? When will the soreness go away? How long before I stop feeling like I need to protect that tooth with every bite?
These are the questions that patients ask most often after root canal treatment in Oshiwara, and this guide answers all of them in detail. You will get a realistic, day-by-day and week-by-week picture of what recovery actually looks like, what foods are safe at each stage, what sensations are normal versus what should prompt a call to your dentist, and how to give your treated tooth the best possible chance of a long, healthy life.
What Happens During a Root Canal, and Why Does Recovery Take Time?
Understanding recovery starts with understanding what the procedure actually involves. Despite its intimidating reputation, a root canal is a routine restorative procedure designed to save a tooth whose inner pulp tissue has become infected or irreversibly inflamed.
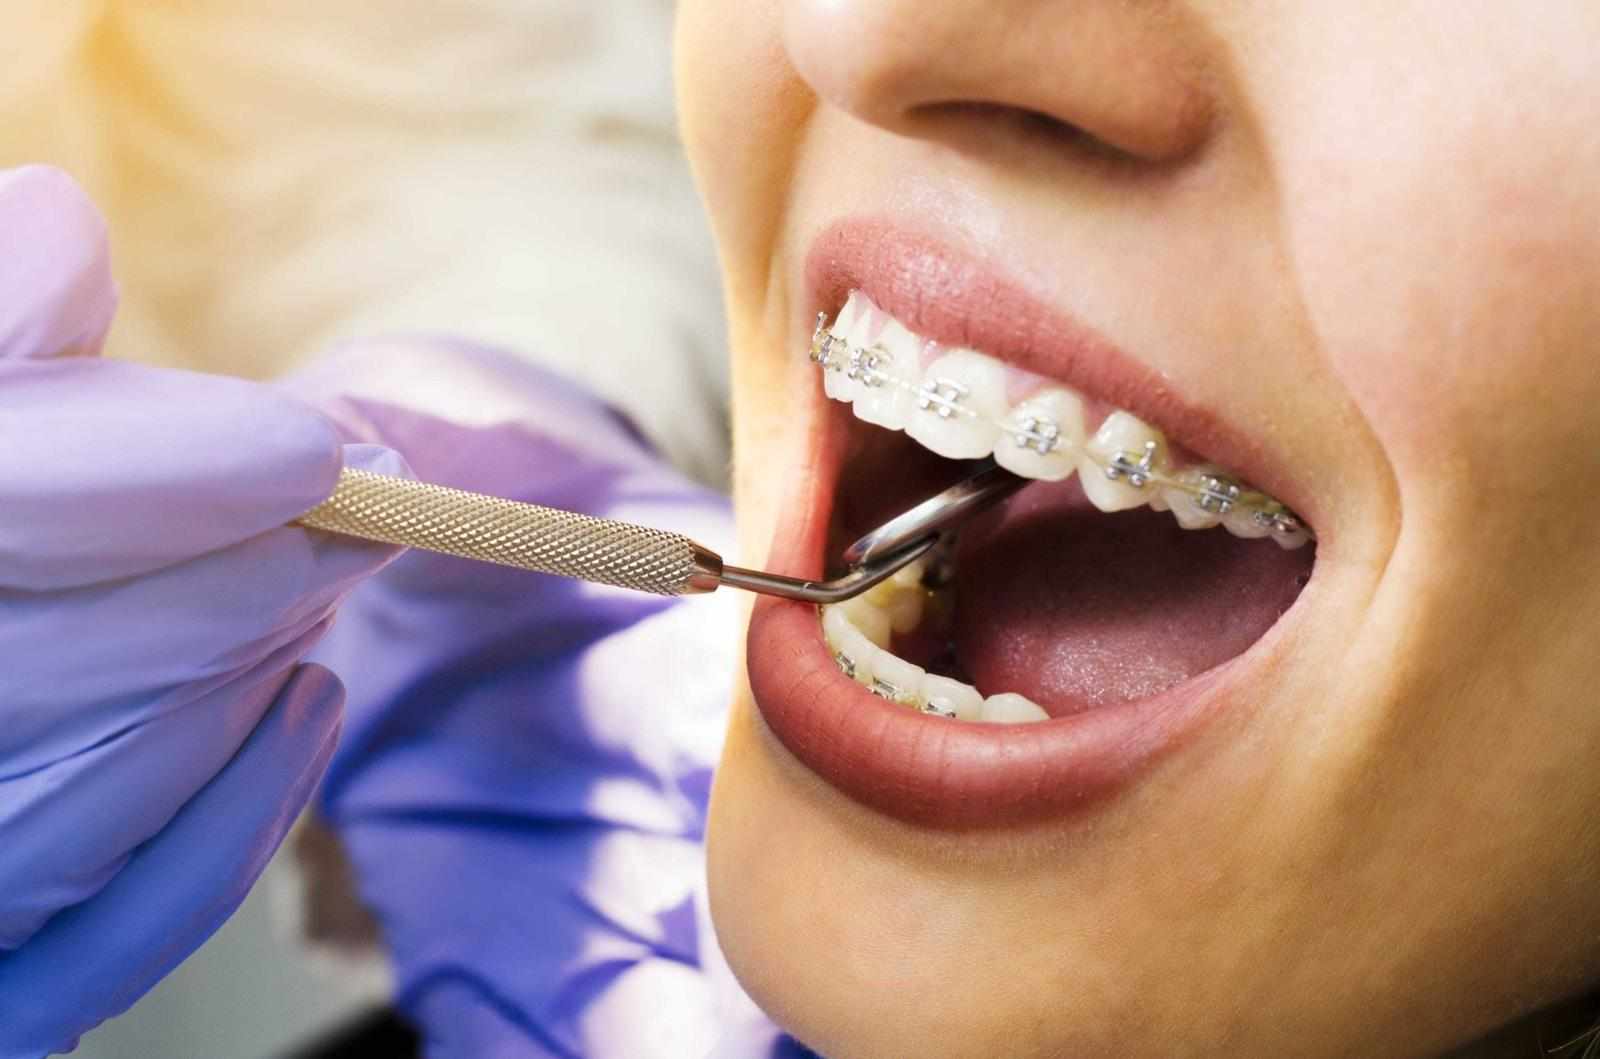
During root canal therapy, the dentist or specialist creates an access opening in the crown of the tooth, removes the infected or dying pulp tissue from the root canals, meticulously cleans and shapes the canal walls using fine instruments, irrigates with antibacterial solutions, and fills the canals with a biocompatible material called gutta-percha. A temporary or permanent filling is then placed to seal the tooth.
The reason some discomfort follows the procedure is straightforward. The tissues surrounding the root tip (the periapical tissues) are often already inflamed from the infection that made the root canal necessary. The instrumentation and irrigation process, while precise, involves working within a small, confined space very close to these inflamed tissues. A degree of post-procedural soreness is therefore expected and is not a sign that anything has gone wrong.
A root canal does not cause pain. It relieves the far greater pain of a dental infection. The mild soreness that follows the procedure is temporary and manageable. The throbbing, constant pain of an untreated infected tooth is not.
The Root Canal Recovery Timeline: Phase by Phase
Phase 1 First 24 Hours After Treatment
The first 24 hours are the most important period for establishing good recovery habits. Here is what to expect and what to do:
What you will feel: The local anesthesia will wear off 2 to 4 hours after the procedure. As it does, you may notice tenderness around the treated tooth, sensitivity when biting down, and mild aching in the jaw. This is entirely normal and expected.
Pain management: Take any pain relief your dentist prescribed or recommended before the anesthesia fully wears off rather than waiting until you are in discomfort. Over-the-counter anti-inflammatory medications like ibuprofen are often highly effective because they address the underlying tissue inflammation rather than simply masking pain signals.
Eating in the first 24 hours: Do not eat on the side of the treated tooth for the first 24 hours at minimum. The temporary filling placed to seal the tooth needs time to set fully, and chewing on it too soon risks disturbing or cracking it. Stick to soft foods that require minimal chewing and can be eaten on the opposite side of the mouth.
Safe foods in the first 24 hours include: curd, soft khichdi, mashed dal, smoothies, soft scrambled eggs, soup, banana, soft idli, and cold or room-temperature beverages. Avoid very hot foods and drinks, which can increase inflammation in the treated area.
Avoid these in the first 24 hours: Do not smoke, drink through a straw with force, rinse vigorously, eat hard or crunchy foods, or chew on the treated side. These actions can disturb the temporary seal and delay healing.
Phase 2 Days 2 to 4: Managing Initial Soreness
The second and third days are typically the peak of post-procedural soreness for most patients. The tissue inflammation around the root tip reaches its highest point and then begins to subside. Tenderness when biting, aching in the jaw, and mild sensitivity to pressure are all normal during this window.
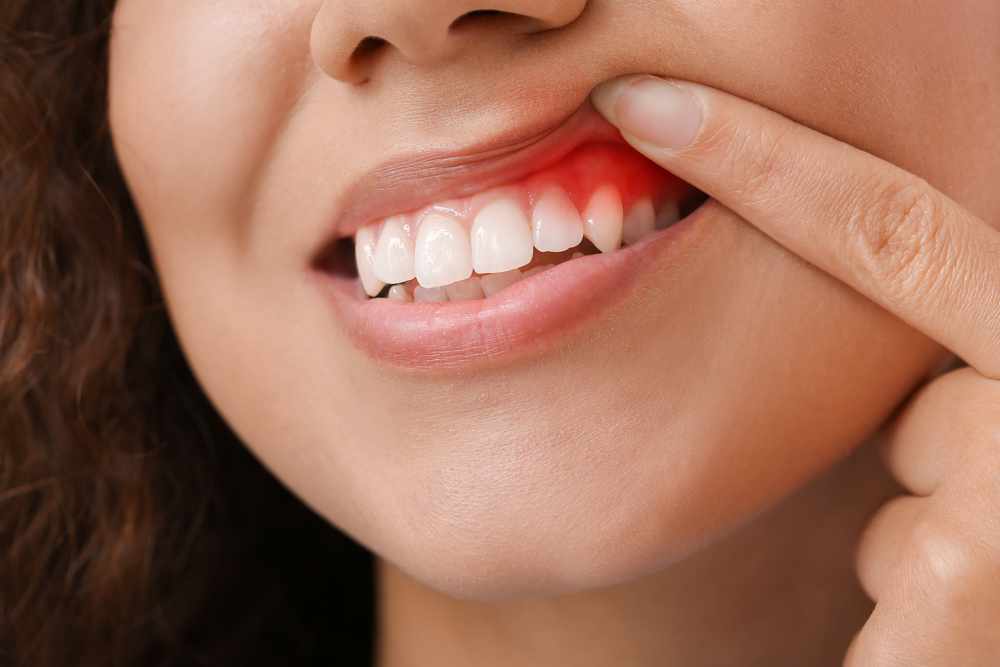
What is normal: Dull aching that is manageable with over-the-counter pain relief, mild swelling of the gum around the treated tooth, slight sensitivity when the tooth is touched or pressed, and a feeling of the tooth being "different" when you close your bite.
What should prompt a call to your dentist: Severe, worsening pain that is not controlled by pain relief, significant swelling of the face or jaw, fever, a bad taste in the mouth suggesting the temporary filling has dislodged, or visible swelling around the treated tooth that is increasing rather than decreasing.
Diet during days 2 to 4: Continue eating soft foods on the opposite side of the mouth. You can slightly expand your food options but still avoid anything that requires significant chewing on the treated side. Soft pasta, well-cooked rice, soft fish, mashed vegetables, and soft bread without crusts are all reasonable choices.
Phase 3 Days 5 to 7: Tenderness Subsiding
By the end of the first week, most patients with straightforward cases notice a significant reduction in discomfort. The tooth may still feel slightly tender to firm pressure, but the constant aching and sensitivity to light touch typically resolves by this point.
Eating by day 5 to 7: If the tooth feels comfortable and your dentist has confirmed a well-sealed temporary filling, you can cautiously begin reintroducing semi-solid foods. Soft cooked vegetables, soft paneer, well-cooked lentils, soft chapati, and similar foods are appropriate. Avoid very hard or very crunchy foods and continue to chew on the opposite side where possible.
Important reminder: A tooth that has had a root canal but has not yet received its permanent crown is significantly more fragile than a healthy natural tooth. The crown of the tooth has been opened for access and is held together by a temporary filling. Biting hard on this tooth before the crown is placed risks cracking the remaining tooth structure, which can make the tooth unrestorable and may mean extraction. Treat the tooth gently until the permanent crown is cemented.
Phase 4 Weeks 2 to 4: Returning to Normal
For most patients who have received painless root canal treatment in Oshiwara with modern techniques, the second and third weeks bring a return to largely normal daily function. The periapical tissues continue to heal and the tooth becomes progressively more comfortable under normal biting forces.
By the end of the second week, most patients can eat a relatively normal diet, avoiding only very hard foods (hard nuts, crusty bread, hard biscuits, bones) and very chewy or sticky foods (toffee, chewing gum, very tough meat) on the treated side. Gradual reintroduction of your normal diet is appropriate.
This is also the window in which your dentist will typically schedule the appointment to place the permanent crown. Do not delay this appointment. The temporary filling is not a long-term solution and will eventually leak or fail, recontaminating the treated canals and potentially necessitating retreatment.
Phase 5 After Crown Placement: Full Recovery
Once the permanent crown is cemented over the treated tooth, full functional recovery is complete. The crown restores the full biting surface, protects the remaining tooth structure from fracture, and seals the root canal system from reinfection.
Most patients can eat normally on the crowned tooth within 24 hours of permanent crown cementation, though avoiding very hard foods for the first few days while the cement fully sets is sensible. After that, no permanent dietary restrictions apply to the crowned tooth.
Full biological healing of the periapical tissues takes 6 months to a year, but this process is entirely internal and symptom-free in successful cases. Patients are unaware of it happening. Follow-up X-rays at 6 and 12 months confirm that the bone around the root tip is healing as expected.
Recovery Timeline at a Glance
TimeframeExpected SensationsDiet GuidanceFirst 24 hoursNumbness fading, mild ache beginningSoft foods only, opposite side of mouth, avoid hot foodsDays 2 to 4Peak soreness, bite tenderness, mild jaw acheSoft diet continues, no chewing on treated sideDays 5 to 7Soreness reducing, tooth still tender to firm pressureSemi-soft foods cautiously, still avoid hard and crunchyWeeks 2 to 4Largely comfortable, occasional mild sensitivityNear-normal diet, avoid very hard and sticky foodsAfter crown placementNormal, no ongoing symptomsFull normal diet within 24 to 48 hours6 to 12 monthsBone healing confirmed on follow-up X-rayNo restrictions
Foods to Eat and Foods to Avoid After Root Canal Treatment
Best Foods to Eat During Recovery
Curd and lassi: Cool, soothing, and require no chewing
Dal and soft khichdi: Nutritious, soft, and easy to eat on one side
Mashed or pureed vegetables: Provide nutrition without requiring chewing pressure on the treated tooth
Smoothies and protein shakes: Excellent caloric and nutritional intake without any chewing required
Soft-boiled eggs or scrambled eggs: High protein, minimal chewing
Soft cooked fish: Flakes apart easily, protein-rich, and gentle on the tooth
Banana, papaya, and soft fruit: Naturally soft and do not require significant biting force
Soft idli and upma: Traditional South and West Indian foods that are naturally well-suited to post-dental recovery
Ice cream and cold desserts: Can provide soothing relief from mild inflammation in the first day or two
Foods to Avoid Until Crown Is Placed
Hard nuts, seeds, and popcorn
Raw hard vegetables: carrots, celery, raw apple
Crusty bread and hard biscuits
Chewing gum and toffee
Very chewy meat or dried fruit
Very hot food and drinks in the first 48 hours
Alcohol (interferes with medication and healing)
Carbonated drinks in the first 24 hours
What Is Normal After a Root Canal and What Is Not
One of the biggest sources of patient anxiety after a root canal is not knowing whether what they are experiencing is expected or a sign of a problem. Here is a clear guide:
Normal Post-Treatment Sensations
Mild to moderate aching for 3 to 5 days, gradually improving
Tenderness when biting down, especially in the first week
Mild sensitivity to pressure when touching the tooth or the gum around it
A slight feeling that the tooth is "high" in the bite immediately after treatment (this settles as swelling reduces)
Very mild gum soreness or irritation around the treated tooth
Symptoms That Need a Call to Your Dentist
Pain that is worsening after day 4 rather than improving
Severe pain unrelieved by prescribed or over-the-counter medication
Visible swelling of the face, jaw, or neck
Fever above 38 degrees Celsius
The temporary filling falling out, leaving the tooth open
A foul taste in the mouth suggesting infection is still active
Numbness or tingling that does not resolve within 8 hours of treatment
Key insight: The discomfort curve after a root canal should always trend downward. Each day should feel slightly better than the last. If your pain is increasing rather than decreasing beyond the first 3 to 4 days, that is the signal to contact your dentist in oshiwara for an assessment.
Why the Crown After Root Canal Is Not Optional
This is one of the most important pieces of information for patients to understand, because it is also one of the most commonly ignored. A root canal removes the pulp tissue from inside the tooth, which means the tooth no longer has a blood supply. This makes it more brittle than a vital tooth and significantly more susceptible to fracture under normal biting forces, particularly in back teeth that bear the brunt of chewing load.
Without a crown, a successfully root canal-treated tooth can crack along an invisible line and split vertically. A vertical root fracture is irreparable and almost always results in extraction of the tooth. This means that patients who invest in advanced root canal treatment and then skip the crown step often end up losing the very tooth they worked to save.
A crown protects the tooth by encasing the entire visible structure, holding it together and distributing biting forces evenly across the surface. For front teeth, a well-made all-ceramic crown also restores full aesthetics. For back teeth, a high-strength zirconia or PFM crown provides the durability needed for years of normal chewing function.
When your best root canal treatment in Oshiwara provider recommends a crown after your root canal, it is not an optional add-on. It is an essential component of a complete, successful treatment outcome.
How Modern Root Canal Treatment Has Changed
For many patients, fear of root canal treatment is based on experiences or descriptions from a generation ago. Modern techniques have transformed what is involved significantly, and understanding this often reduces anxiety considerably.
At a quality affordable root canal treatment in Oshiwara clinic, contemporary root canal treatment typically involves:
Digital X-rays and apex locators: Electronic devices that precisely determine the working length of each root canal, reducing the need for multiple X-rays and improving accuracy
Rotary nickel-titanium instruments: Flexible, motor-driven files that shape the canals far more efficiently and consistently than manual hand files, reducing procedure time and patient discomfort
Ultrasonic irrigation: Activating irrigant solutions with ultrasonic energy to clean the complex internal canal anatomy more thoroughly than conventional syringe irrigation alone
Rubber dam isolation: A thin sheet of rubber placed around the treated tooth that keeps the working field completely dry, prevents contamination, and significantly improves the quality and predictability of the procedure
Warm vertical condensation of gutta-percha: A filling technique that better adapts the root canal filling material to the complex internal anatomy of the canals, creating a denser, more complete seal
For complex cases involving calcified canals, curved roots, previously failed root canals, or teeth requiring retreatment, referral to an endodontist in Oshiwara (a specialist in root canal procedures) ensures the highest level of technical precision and the best possible outcome.
Tips to Speed Up Recovery After Root Canal Treatment
Beyond following the dietary guidelines above, several evidence-based practices help the healing process proceed as smoothly and quickly as possible:
Keep your head elevated while sleeping for the first 2 to 3 nights to reduce blood pooling in the area and minimize swelling
Use cold compresses on the cheek for 15 to 20 minutes at a time in the first 24 hours to reduce inflammation. Switch to warm compresses from day 2 onward to encourage blood flow and healing
Complete your full antibiotic course if prescribed, even if you begin feeling better before the course ends. Stopping early risks incomplete eradication of bacteria
Maintain gentle oral hygiene: Brush the treated area gently with a soft brush from the day after treatment. Avoiding the area entirely allows plaque to accumulate, which can complicate gum healing
Stay hydrated: Adequate fluid intake supports tissue healing throughout the body including the periapical tissues around the treated root
Avoid strenuous exercise for the first 48 to 72 hours, as elevated heart rate and blood pressure can increase throbbing discomfort in the treated area
Do not smoke: Smoking significantly impairs healing by reducing blood oxygen levels and impairing the immune response in oral tissues
When to Consider Root Canal Retreatment
In a small percentage of cases, a previously root canal-treated tooth develops symptoms again months or years after the original treatment. This can happen due to a new bacterial contamination through a crack or a failed restoration, incomplete cleaning of a missed or complex canal during the original procedure, or persistent infection in the periapical tissues that failed to resolve.
Root canal retreatment involves re-entering the tooth, removing the previous root filling material, re-cleaning and reshaping the canals, and placing a new root filling. While more technically demanding than an initial root canal, retreatment at a clinic offering tooth root canal treatment at a specialist level is highly successful in appropriately selected cases and often allows a tooth to be saved that might otherwise require extraction.
Signs that a retreated root canal may be needed include a return of persistent pain in a previously treated tooth, a new swelling or sinus tract near the root tip on X-ray, or a tooth that never fully settled after the original procedure.
Choosing the Right Clinic for Root Canal Treatment in Oshiwara
The quality of your root canal treatment directly influences both the comfort of the procedure and the long-term success of the outcome. Here is what to look for when selecting a dental clinic in oshiwara for root canal care:
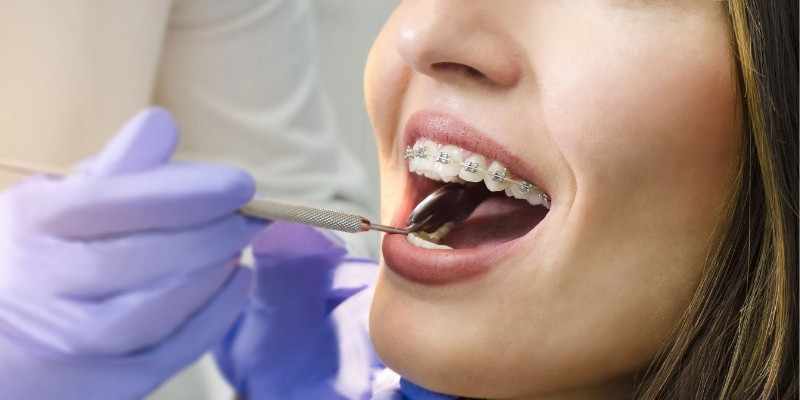
Rotary instrumentation: Confirms the clinic uses modern technique rather than manual hand filing alone, which reduces both procedure time and post-operative discomfort significantly
Rubber dam use: A non-negotiable quality indicator. Any provider who does not routinely use rubber dam for root canal procedures is not following current evidence-based standards
Digital X-ray and apex locator: Ensures accurate working length determination and minimizes radiation exposure compared to conventional film X-ray
Availability of specialist referral: A good general dental clinic will recognize when a case exceeds its scope and refer to an endodontic specialist rather than attempting a complex case beyond its technical capabilities
Transparent pricing: The cost of the root canal procedure and the crown should both be quoted clearly and in writing before treatment begins
Post-treatment follow-up: A quality clinic schedules follow-up X-rays at 6 to 12 months to confirm periapical healing and monitors the restored tooth over time
FAQs: Root Canal Recovery in Oshiwara
Q1: How long will I be numb after my root canal appointment?
Local anesthetic used for root canal treatment in Oshiwara typically wears off within 2 to 4 hours after the procedure, though this varies by individual and by the specific anesthetic used. Do not eat on the treated side until the numbness has fully resolved, as you could inadvertently bite your cheek or tongue without realizing it. If numbness persists beyond 8 hours, contact your dental clinic.


Write a comment ...